Building a basic chicken coop is a project that blends practicality with creativity. Whether you’re raising chickens for eggs, meat, or companionship, a well-built coop ensures their safety, health, and happiness.
This guide dives deep into every stage of construction—from selecting materials to adding finishing touches.
Let’s roll up our sleeves and create a coop that your flock will love!
Why Build Your Own Chicken Coop?
- Cost Savings: Pre-built coops can Pre-built coops can cost over 1,000, while DIY builds often range from 200 to 600.
- Customization: Tailor the design to your flock size, climate, and aesthetic preferences.
- Quality Control: Avoid flimsy store-bought coops by using durable, predator-resistant materials.
- Sustainability: Repurpose scrap wood, pallets, or old windows for an eco-friendly build.

Step 1: Planning Your Chicken Coop
A. Choosing the Perfect Location
- Sunlight: Aim for morning sun (east-facing) and afternoon shade to regulate temperature.
- Drainage: Avoid low-lying areas prone to flooding. Elevate the coop slightly for runoff.
- Proximity: Place the coop close enough for easy access but far from noisy areas (e.g., roads).
B. Calculating Size Requirements
- Indoor Space: 3–4 sq ft per chicken. Example: 6 chickens = 18–24 sq ft.
- Outdoor Run: 8–10 sq ft per chicken. Example: 6 chickens = 48–60 sq ft.
- Nesting Boxes: 1 box per 3–4 hens (12”x12”x12” each).
C. Legal Considerations
- Check local zoning laws for coop size limits, setback requirements, and flock size restrictions.
- Some neighborhoods require permits for structures over 120 sq ft.
Step 2: Gathering Tools & Materials
Tools Needed
- Circular saw or handsaw
- Drill/driver
- Staple gun (for hardware cloth)
- Level, measuring tape, and pencil
- Safety gear: gloves, goggles, mask
Materials List
- Lumber:
- 4×4 posts (for foundation)
- 2x4s (framing)
- ½” plywood (walls and floor)
- Roofing: Corrugated metal or asphalt shingles
- Hardware Cloth: ½” mesh (not chicken wire!)
- Fasteners: Galvanized screws, hinges, latches
- Extras: Nesting boxes, roosting bars, ventilation panels
Step 3: Building the Foundation
A. Building a Skid Foundation
- Cut two 4×4 pressure-treated beams to the length of your coop.
- Place them parallel on level ground, spaced to match the coop’s width.
- Secure 2×4 floor joists across the beams every 16” for support.
Pro Tip: Use concrete blocks under the skids for added elevation and rot prevention.
B. Installing the Floor
- Attach ½” plywood to the joists with 2” screws.
- For easy cleaning, line the floor with vinyl or linoleum.
Step 4: Framing the Walls
A. Constructing Wall Panels
- Build wall frames using 2x4s:
- Two vertical studs (height of the coop).
- Top and bottom plates (length of the wall).
- Add horizontal studs every 16” for stability.
B. Adding Door and Window Openings
- Door: Frame a 24”x30” opening for human access.
- Windows: Cut 12”x12” openings near the roof for cross-ventilation.
Step 5: Assembling the Structure
- Attach Walls to the Foundation: Secure walls to the floor frame with 3” screws.
- Install Roof Rafters: Angle rafters slightly (15–30 degrees) for water runoff.
- Sheath Walls & Roof: Cover frames with plywood, leaving openings for doors and windows.
Pro Tip: Use a friend to hold walls steady while assembling!
Step 6: Adding Ventilation & Windows
A. Ventilation
- Cut 4”x12” vents near the roof (one on each side).
- Cover vents with hardware cloth to keep pests out.
B. Windows
- Frame windows with 1×2 trim and attach hardware cloth.
- Add hinged shutters for weather protection.
Step 7: Installing Doors & Latches
- Human Door: Hang a pre-built door or construct one from plywood and 2x4s.
- Chicken Door: Cut a 12”x12” opening with a hinged ramp for flock access.
- Predator-Proof Latches: Use slide bolts or carabiner clips—raccoons can open basic hooks!
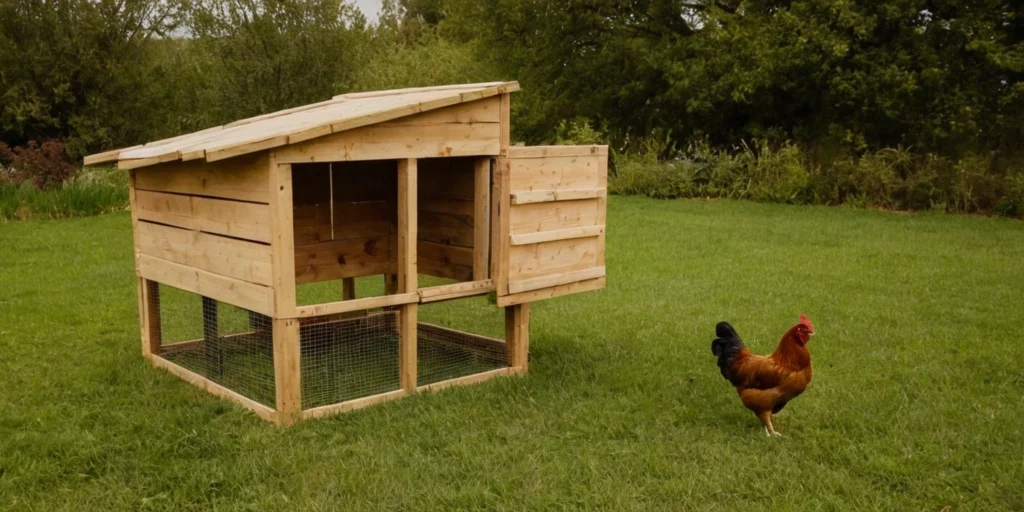
Step 8: Building Nesting Boxes & Roosts
A. Nesting Boxes
- Build 12”x12”x12” boxes from plywood.
- Attach to the coop’s darkest wall, 18” off the ground.
- Line with straw or pine shavings for egg-laying comfort.
B. Roosting Bars
- Install 2”x2” wooden bars 2–3 feet high.
- Allow 8–10” of space per bird.
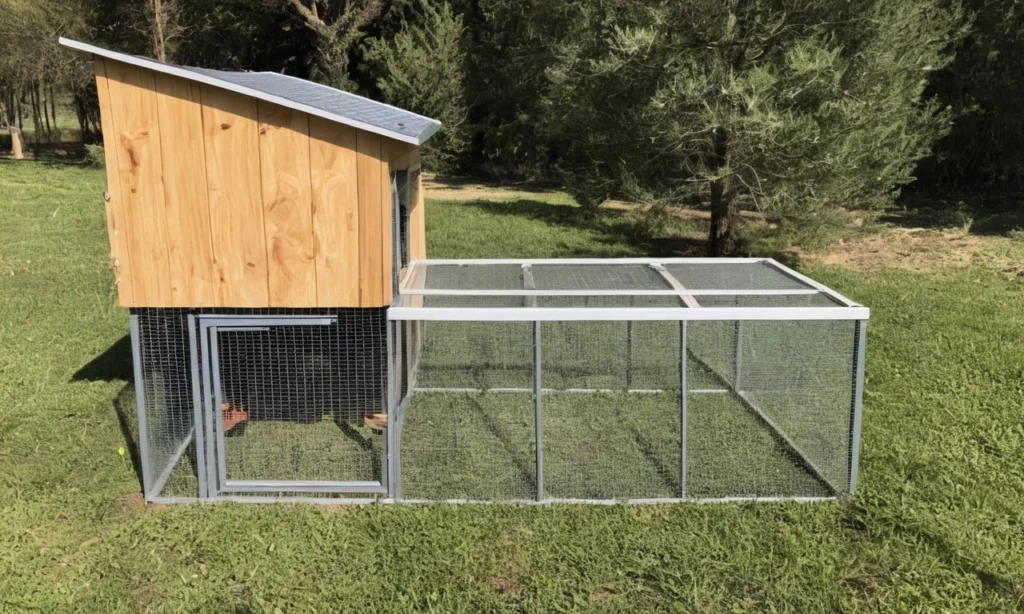
Step 9: Constructing the Outdoor Run
- Frame the Run: Use 4×4 posts and 2x4s to create a perimeter.
- Cover with Hardware Cloth: Staple ½” mesh to all sides, including the roof.
- Bury the Edges: Dig a 12” trench around the run and bury hardware cloth to deter diggers.
Pro Tip: Add a sand or gravel base for drainage.
Step 10: Predator-Proofing
- Secure All Openings: Double-check gaps around doors and windows.
- Motion-Activated Lights: Deter nocturnal predators like foxes.
- Locking Feeders: Store feed in metal bins to avoid attracting rodents.
Step 11: Final Touches
- Paint or Stain: Use non-toxic paint to protect wood from weather.
- Add Insulation: In cold climates, line walls with foam board.
- Landscaping: Plant herbs like mint or lavender around the coop to repel pests.
Maintenance Checklist
- Daily: Refill food/water, collect eggs.
- Weekly: Replace bedding, scrub feeders.
- Seasonal: Deep-clean coop, inspect for wear.
FAQs About Building a Basic Chicken Coop
Q: Can I use reclaimed wood for my coop?
A: Yes! Sand it thoroughly to remove splinters and check for rot.
Q: How do I keep the coop warm in winter?
A: Avoid heat lamps (fire hazard!). Insulate walls and use the “deep litter” method for natural warmth.
Q: Should I add wheels to the coop?
A: Mobile “chicken tractors” are great for rotating grazing areas, but stationary coops are sturdier.
Q: How high should the roosting bars be?
A: 2–3 feet—chickens prefer to sleep elevated but can’t fly like birds.
Q: What’s the best bedding material?
A: Pine shavings (avoid cedar—it’s toxic) or straw.
Ready to Start Building?
With this guide, you’re equipped to tackle building a basic chicken coop like a pro! For more tips on raising happy hens or choosing the best feed, explore our resource library. Stuck on a step? Reach out to our poultry experts 24/7 at https://chickiq.com/contact-us/. Let’s get clucking!